

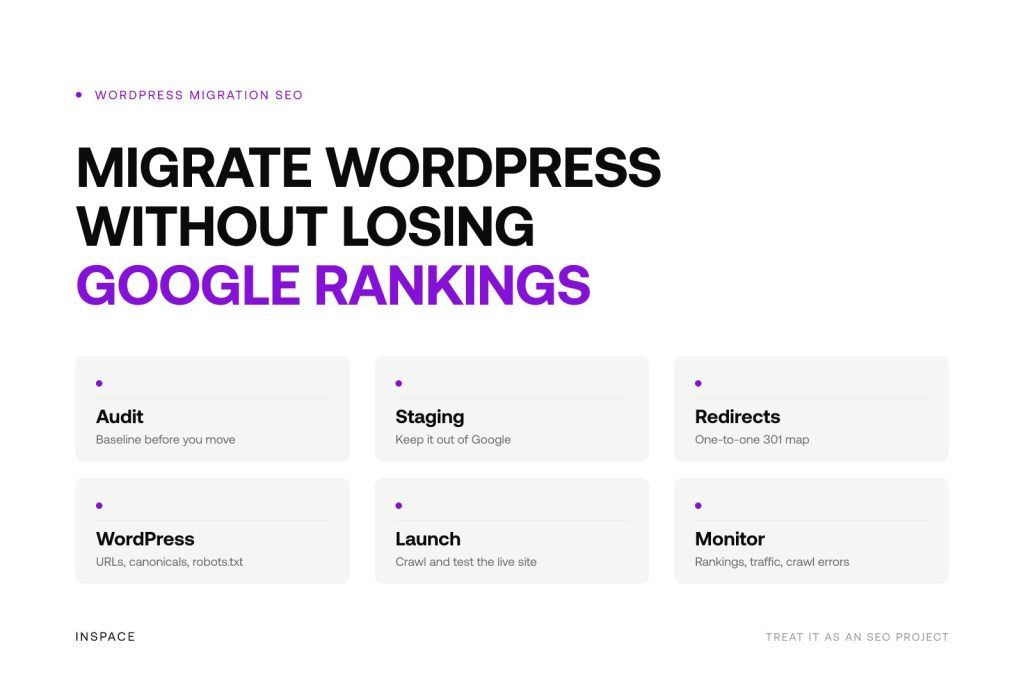
A WordPress migration can affect organic visibility when Google encounters changed URLs, broken internal links, inaccessible pages or conflicting indexation signals. Whether you are changing hosting, redesigning your website, moving to HTTPS or switching domains, the goal is the same: make it easy for users and search engines to find the correct version of every important page.
You cannot guarantee that rankings will never fluctuate during a migration, especially after a domain change. However, a structured SEO migration plan significantly reduces avoidable traffic loss and helps Google transfer signals from the old site to the new one. For a structured process, see how to create an SEO migration plan.
Start with the lowest-risk migration approach
The safest option is to keep the domain name, URL structure, page content and metadata unchanged while moving the WordPress website to a new hosting provider. In that scenario, Google should continue to see the same pages at the same addresses.
Risk increases when you also change domains, remove pages, alter permalink structures or launch a major redesign. These changes are possible, but they require detailed preparation. Treat a migration as an SEO project, not only as a technical deployment. For domain changes, read SEO for a domain migration.
Audit the existing site before making changes
Before migrating, create a record of what currently performs in search. This provides a baseline for redirect mapping, quality assurance and post-launch monitoring.
- Crawl the current website and export all indexable URLs, status codes, titles, meta descriptions, canonical tags and internal links.
- Identify the pages that generate the most organic traffic, conversions, backlinks and impressions.
- Export keyword and page-performance data from Google Search Console.
- Download a full WordPress backup, including files, database, media library and configuration files.
- Document your current robots.txt file, XML sitemap, structured data and analytics setup.
Prioritise high-value URLs. A forgotten redirect on an unimportant archive page is rarely critical. A missing redirect on a product, service or high-ranking article can result in lost traffic, links and leads.
Keep the staging environment out of Google
A staging site is useful for checking the migration before launch, but it must not compete with the live website in search results. Protect the test environment with authentication where possible. In addition, use a noindex directive and ensure the staging domain is not included in XML sitemaps.
Do not rely solely on WordPress’s “Discourage search engines from indexing this site” setting. Check the page source and HTTP response headers to confirm that search engines receive the intended noindex signal. Before launch, remove staging restrictions from the new live site.
Create a one-to-one URL redirect map
If the domain or URL structure changes, permanent 301 redirects are the foundation of a successful SEO migration. Each old URL should redirect directly to its closest equivalent new URL.
For example, if /wordpress-seo-guide/ moves to /guides/wordpress-seo/, redirect the old page directly to that new page. Avoid sending all old URLs to the homepage. This creates a poor user experience and makes it harder for Google to understand the relationship between the old and new content.
| Old URL status | Correct action |
|---|---|
| The page has a clear replacement | Add a direct 301 redirect to the matching new URL. |
| The page remains unchanged | Keep the same URL and confirm it returns a 200 status code. |
| The content has been merged into another relevant page | Redirect to the most relevant consolidated page. |
| The page has no useful equivalent and should stay removed | Return a 404 or 410 status rather than redirecting to an unrelated page. |
Implement redirects at server level where possible, rather than creating long chains through multiple plugins or rules. A redirect chain such as old URL → temporary URL → new URL slows down crawling and may weaken the migration signal. Test that every redirected URL reaches the final destination in one step.
Check WordPress URLs, internal links and technical signals
After moving the site, update the WordPress Address and Site Address settings if required. Then check whether references to the old domain remain in posts, pages, media files, menus, custom fields, canonical tags or schema markup. If you are moving WordPress to another platform, use a CMS migration checklist to prepare the technical and SEO checks.
A controlled search-and-replace can update absolute internal URLs, but always take a fresh database backup first. Do not blindly replace values in complex fields or plugin settings without testing. WordPress sites often contain serialised data, and incorrect database edits can break layouts or functionality.
Validate these WordPress migration essentials
- Permalinks load correctly and important URLs do not return 404 errors.
- Internal links point to the preferred new URLs rather than redirected old URLs.
- Images, PDFs, scripts and CSS files load over HTTPS without mixed-content warnings.
- Canonical tags reference the correct live URLs.
- The robots.txt file does not block key pages, assets or sections of the website.
- Important pages are indexable and do not contain accidental noindex tags.
- XML sitemaps contain only canonical, indexable URLs that return a 200 status code.
- Cache, CDN and security settings have been refreshed for the new environment.
Also preserve on-page SEO elements where the content has not materially changed. Page titles, headings, meta descriptions, structured data and internal-link context help Google understand that the new URL represents the same relevant page.
Launch carefully and test the live migration
Schedule the migration for a time when your team can monitor the site and resolve issues quickly. Avoid launching immediately before a holiday, campaign or peak sales period.
Once the new site is live, crawl it again. Compare the crawl with your pre-migration export to spot broken pages, missing titles, accidental noindex directives, redirect loops and links still pointing to the old domain. Manually test key conversion paths such as contact forms, checkout flows, logins and downloadable resources. Use this SEO checklist for your website migration to support your launch checks.
If you have moved to a new domain, keep the old domain active and redirecting. Removing it too soon can break valuable backlinks and prevent users from reaching the new website. Maintain redirects for the long term, particularly for URLs with backlinks, rankings or recurring referral traffic.
Tell Google about the new website
Add and verify the new domain or URL property in Google Search Console. Submit the new XML sitemap and monitor the Pages report for indexing problems. When you have completed a full domain move, use Search Console’s Change of Address tool if it applies to your migration setup.
Do not submit a sitemap filled with old redirected URLs. The sitemap should list the final, canonical pages that you want Google to crawl and index.
Monitor rankings, traffic and crawl errors after launch
Search engines need time to crawl redirects, process the new URLs and update their index. Short-term movement can happen, but persistent declines usually point to a migration issue that needs investigation.
Review these signals daily during the first weeks, then regularly over the following months:
- Organic clicks, impressions and average positions in Google Search Console.
- Indexing status for priority pages.
- 404 errors, server errors and redirect problems.
- Organic landing-page traffic in analytics.
- Changes in backlinks pointing to the old domain.
- Page speed and Core Web Vitals after the hosting or theme change.
Where possible, ask owners of your most valuable external links to update them to the new URL. The 301 redirect will handle existing links, but direct links reduce unnecessary redirects and reinforce the new location.
When to involve an SEO specialist
A simple hosting move with unchanged URLs can often be managed by an experienced developer. SEO support becomes especially valuable when changing domains, merging websites, modifying a large URL structure, migrating an e-commerce store or launching a redesigned site with substantial content changes.
InSpace provides SEO advice and optimisation support for technical, structural and content-related website changes, including migration planning and post-launch checks. A focused SEO audit before launch can help identify URL, indexation and content risks before they affect organic visibility.
Frequently asked questions
How do I migrate a WordPress website?
First, create and test a complete backup. Build and validate the new environment, migrate the files and database, update WordPress configuration where necessary, and test the site before making it public. If URLs change, prepare and test 301 redirects before launch.
Should I change hosting and domain name at the same time?
It is possible, but it adds complexity. If timings allow, changing hosting first while keeping the existing domain and URLs can make troubleshooting easier. When both changes must happen together, use a detailed redirect map and allow more time for testing.
How long should 301 redirects remain active after a migration?
Keep redirects in place for as long as possible. At a minimum, they should remain active well beyond the initial reindexing period. Long-term redirects protect users, backlinks and referral traffic that may continue to use old URLs.
Can I temporarily take my WordPress site offline during a migration?
A short maintenance period may be necessary, but minimise downtime. Prolonged outages can affect users, conversions and crawling. If a temporary maintenance page is required, return a 503 status code with a Retry-After header so search engines understand the interruption is temporary.
 We're always on comms.